Creating Your First Pricing Rule
Pricing rules are the heart of PriceFlux. They define when and how your product prices should be adjusted based on sales performance.
Understanding Pricing Rules
A pricing rule consists of three main components:
- Product Filters - Which products the rule applies to
- Conditions - When the rule should trigger (sales velocity changes)
- Actions - What price changes to make
Step 1: Access Rule Creation
- Go to Dynamic Pricing in your PriceFlux dashboard
- Click "Create New Rule"
- Choose a descriptive name for your rule (e.g., "Fast-Moving Electronics Boost")
 Create Dynamic Pricing Rule
Step 2: Set Product Filters
Product filters determine which products your rule will affect.
Filter Types
- Product Title - Match products by name (supports partial title matches)
- Product Type - Target specific product categories
- Vendor - Apply to products from specific suppliers
- Tags - Use existing Shopify tags for precise targeting
- SKU - Match exact product codes
Note: Partial word matching does not work. For a product titled "Gray Slacks", a title filter of "Slacks" will match, but "Slack" will not.
Filter Examples
Product Type: "Electronics"
AND Tag: "fast-moving"
This targets electronics products tagged as "fast-moving".
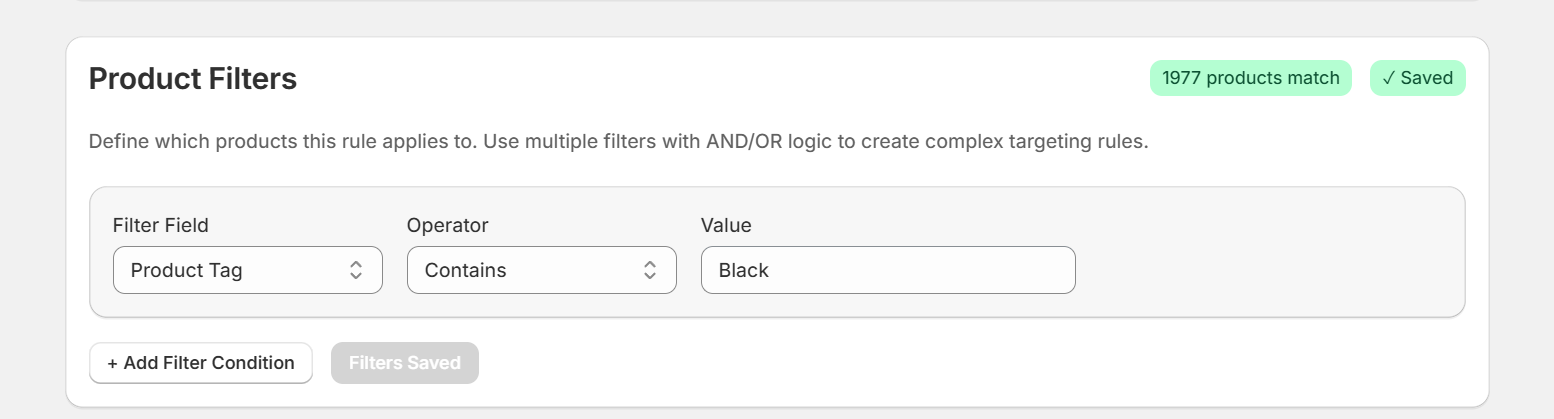 Set Product Filters
Step 3: Configure Conditions
Conditions determine when your rule triggers based on sales velocity.
When you choose a time period, we compare performance over that window to the immediately previous, equal‑length window. The engine calculates the percentage change (velocity) between the two and uses your rules to decide whether to apply pricing actions.
Baseline resets after actions
- When a pricing action executes, the rule’s baseline (revenue, items, orders) is reset to the latest snapshot.
- From that point on, the app monitors performance over your selected analysis period against this new baseline.
- This lets the engine detect whether momentum continues (upward trend) or fades (declining trend) after the price change, and respond accordingly with your configured actions.
Analysis Periods
Choose how far back to analyze sales data:
- Weekly (7 days) - Best for trending products
- Bi‑weekly (14 days) - Balanced approach
- Monthly (30 days) - Stable, long-term analysis
- Quarterly (90 days) - Conservative, seasonal patterns
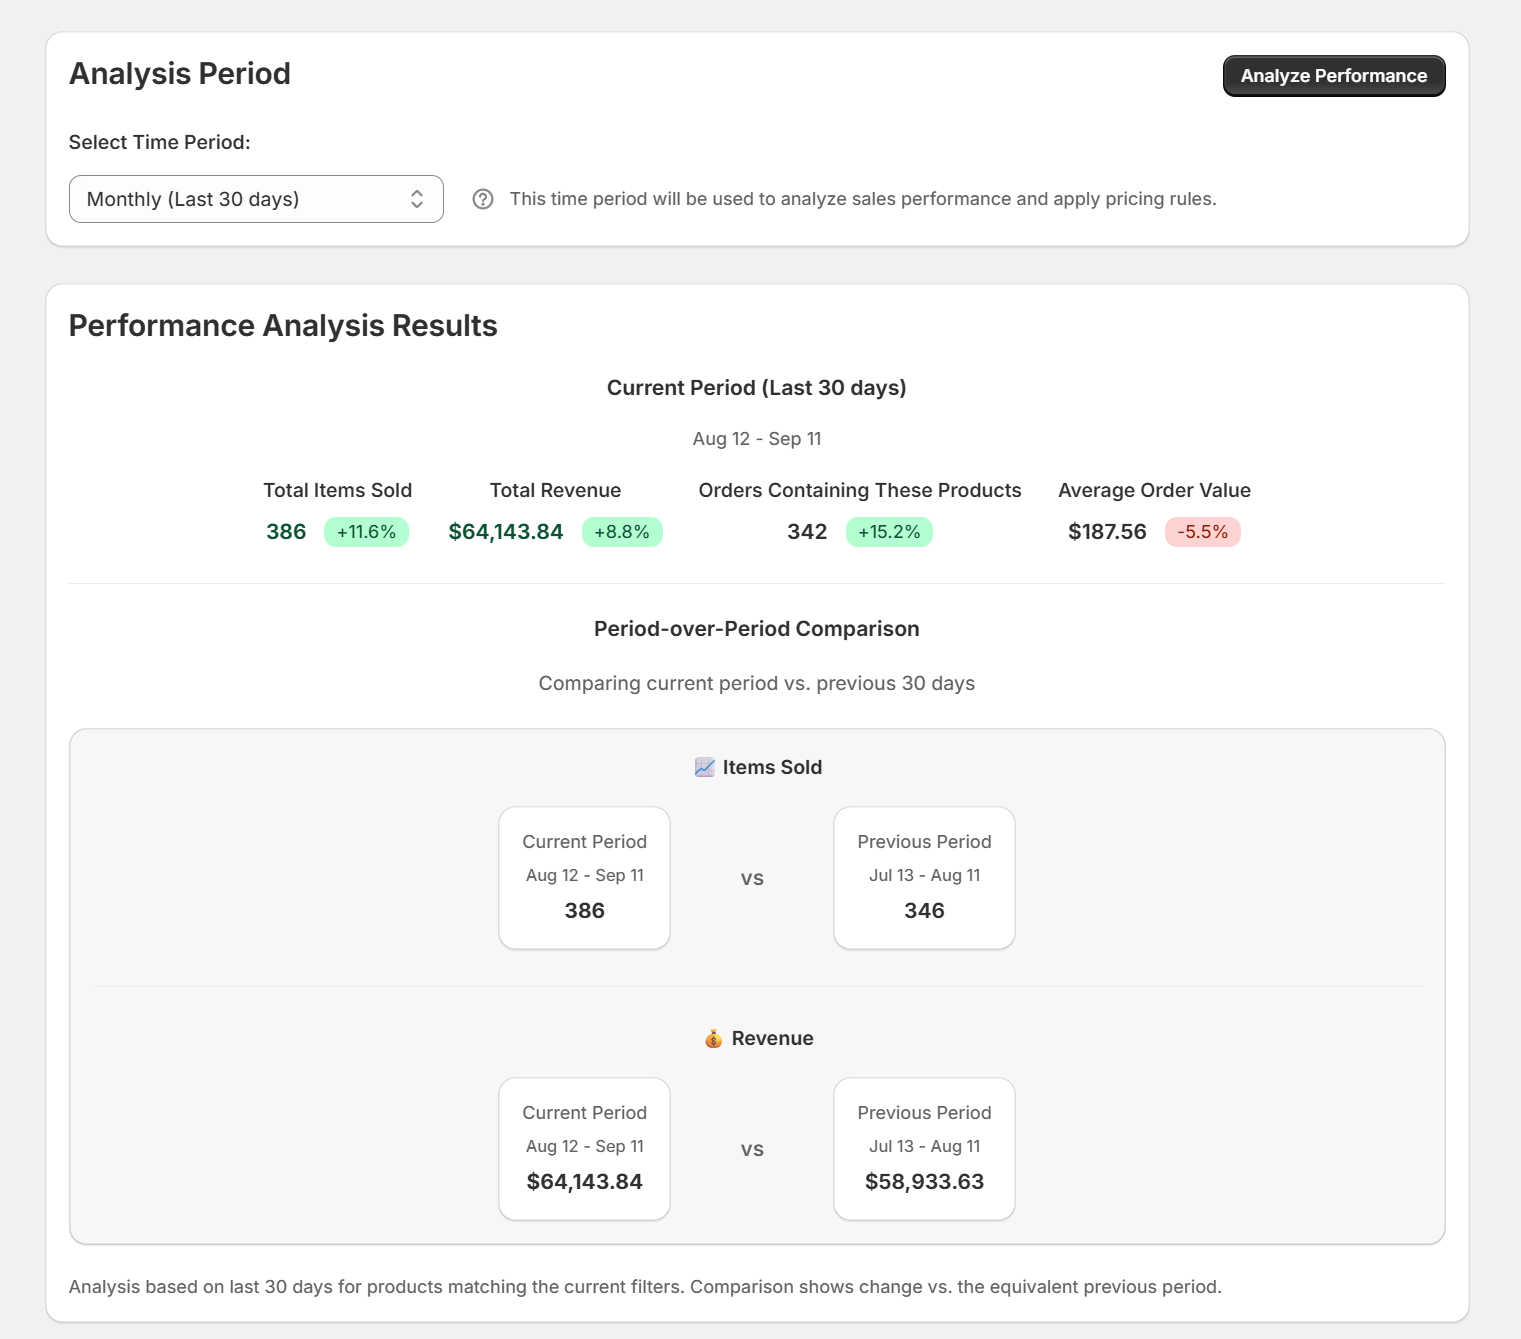 Analyze Sales Data
After you click Analyze Performance, the chart shows:
- Total items sold
- Total revenue
- Orders containing the filtered products
- Average order value
Why this matters: Analyzing performance establishes a baseline for the rule so the engine can track sales velocity from a known starting point.
Use this snapshot to understand current trends and fine‑tune your conditions and actions before activating the rule.
Step 4: Define Actions
Actions specify what price changes to make when conditions are met.
Condition Types
Sales Volume Increase
- Triggers when sales increase by X% compared to baseline
- Example: "Sales volume increases by 20% or more"
Sales Volume Decrease
- Triggers when sales drop by X% compared to baseline
- Example: "Sales volume decreases by 15% or more"
Action Types
Increase Price
- Raise prices for high-performing products
- Can be percentage-based ("+15%") or fixed amount ("+$10")
Decrease Price
- Lower prices for slow-moving inventory
- Helps clear stock and maintain velocity
Safety Limits
Set maximum modifications per action to prevent extreme price swings:
- Max Modifications: Caps how many times this action can adjust a product’s price in the same direction.
How it works
- Each action (e.g., Increase Price) tracks its own modification count per rule.
- When the action triggers, its count increments by 1 until it reaches the max.
- Opposite actions (Increase vs Decrease) are tracked separately and can unwind each other’s progress when the trend reverses.
Example
- You set two actions on a rule: Increase Price (max 3) and Decrease Price (max 3).
- If “Increase Price” triggers twice for a product, it’s at 2/3.
- Later, if “Decrease Price” triggers once, the system begins moving in the opposite direction: the decrease action is now 1/3, and the increase side effectively unwinds.
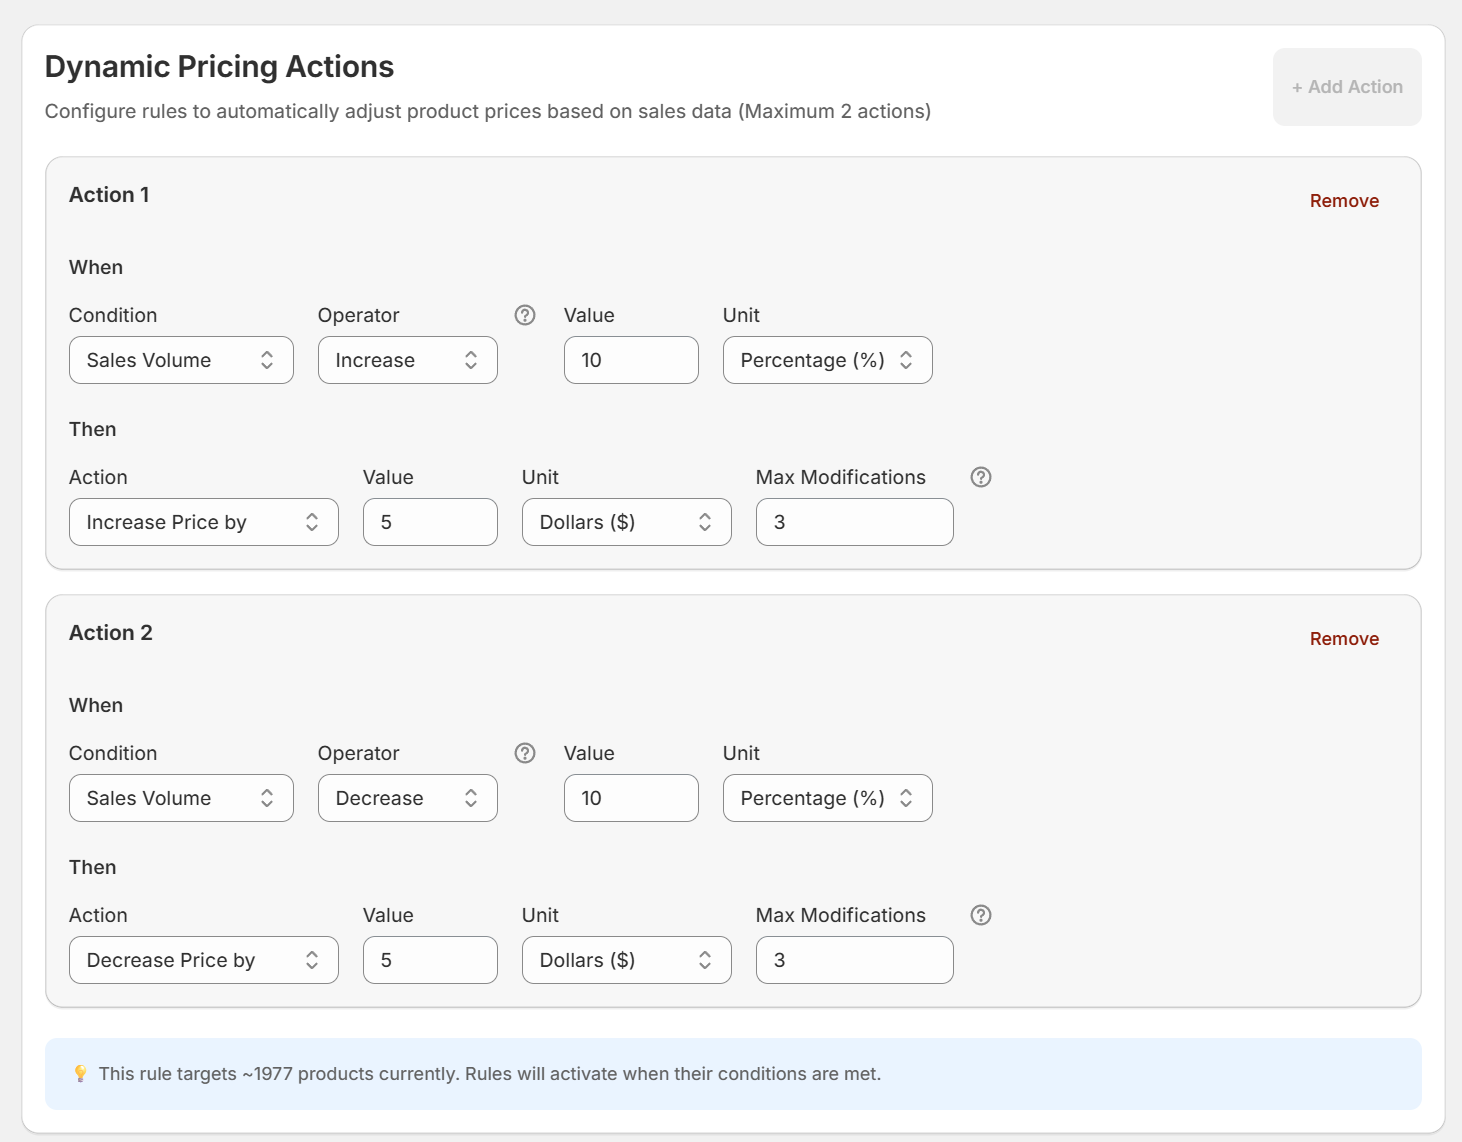 Dynamic Price Actions
Step 5: Save Rule
Example: Fast-Moving Product Rule
Here's a complete example rule setup:
Rule Name: "Electronics Velocity Boost"
Filters:
- Product Type: "Electronics"
- Tag: "premium"
Conditions:
- Analysis Period: Bi-weekly (14 days)
- Trigger: Sales volume increases by 25% or more
Actions:
- Action: Increase Price by 10%
- Max Modifications: 3 per product
This rule will increase prices by 10% for premium electronics that show 25%+ sales growth over a 14-day period, with safety limits in place.
Best Practices
Start Conservative
- Begin with smaller percentage changes (5-10%)
- Use longer analysis periods (monthly) for stability
- Set low modification limits initially
Monitor Performance
- Check your rules weekly after activation
- Use the Analytics dashboard to track revenue impact
- Adjust thresholds based on results
Use Descriptive Names
Good rule names help you manage multiple rules:
- ❌ "Rule 1"
- ✅ "Summer Apparel Clearance"
- ✅ "High-Velocity Electronics Boost"
Next Steps
Need help creating your first rule? Contact support for personalized guidance.